|
 |
 |
 |
 |
 |
 |
||||||||||||
Lambretta Engine WorkGeneralLambrettaDrive Side Bearing & Oil Seal Removal Drive Side Bearing & Oil Seal Installation Flywheel Side Bearing & Oil Seal Installation Resources |
Installing a Lambretta Flywheel Side Bearing & Oil SealThe flywheel side oil seals and bearings are made up of many parts and in Series III bikes all the models are the same except for the GP200. The GP200 crank has a wider crank shoulder but uses the same mag side flange casting. The following steps are from a Lambretta GP 200 (with the LI/SX/TV differences shown) but can be adapted to most Lambretta models starting with the Series I bikes. The images show a stripped GP 200 block. You'll need:
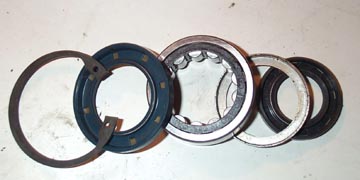 Above is a
shot of the components that go into the mag side flange of the GP200
engine. From left to right is (1) the main circlip, (2) the inboard oil
seal, (3) the outer race of the main bearing, (4) the spacer, (5) the
outer oil seal. The LI, SX, and TV series bikes differ because of a
thinner flywheel side bearing. Due to this difference, another spacer
is used in between the inboard oil seal and the bearing (this will be
covered in the intsallation steps below).
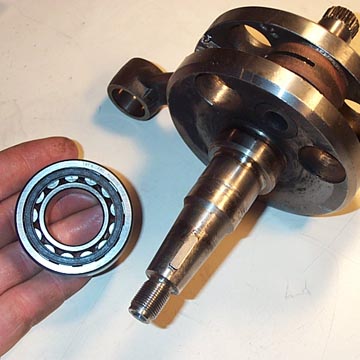
Above is a shot of the LI
style crankshaft with a new flywheel side bearing. The bearing is a two
part assembly. The outer part with the rollers in it goes into the cast
aluminum mag flange. The inner part fits on the crank shaft itself. You
will need to remove the previous race if it is still on the crank. I
took mine down to San Francisco Scooter Center who pulled it off for
me (thanks guys) because they are such a pain to get off. If you don't
have access to the correct tool to remove it or don't have access to a
scooter shop it can be done by heating it up and using vice grips, or
carefully cutting it off but I don't recommend these approaches.
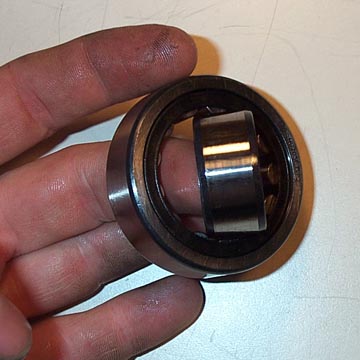
Once the old race is off the
new one can be pushed out of the two part bearing ready to be installed.
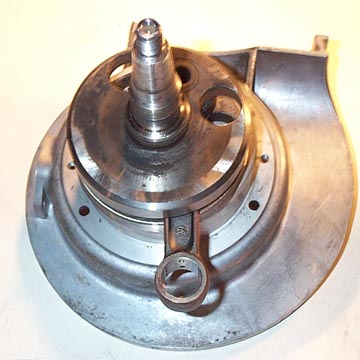
The mag flange is a handy base
to use to get the inner race on. You can set the crank with the drive
side down as a convenient holder.
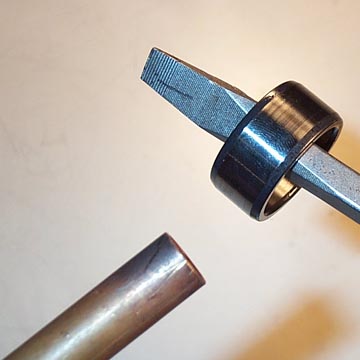
Heat up the inner race on the
end of a screwdriver by using a propane torch. The heat capabilities of
a propane torch don't really have the ability to damage the race but
will make it expand slightly and allow it to drop onto the crank.
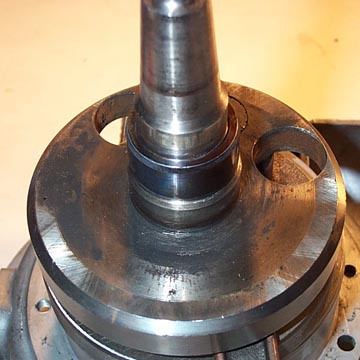
Once the race is hot it can be
dropped down the flywheel side taper. If it is nice and hot it will
drop down all the way to the crank web oil seal lip which is where it
should be. If it doesn't go all the way down, remove the crank from the
mag housing temporary support and support the flywheel side crank web
before tapping the race down with a long tube and hammer. Do not tap it
down without supporting the crank web or you could risk damaging the
crank.
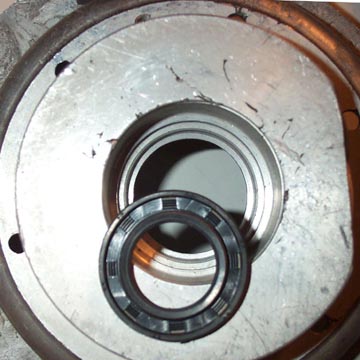
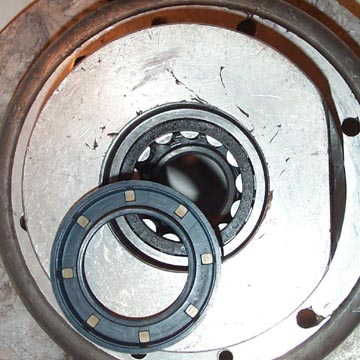
Now that the inner race is on
we can move back to the mag flange. The outboard oil seal is the first
to be put in place from the inside face of the mag flange. Above is a
shot from the crank side of the mag flange. There is a small circular
spring around the lip of the oil seal. This must face towards the crank
once installed. The mag flange can be heated to ease the placement of
the seal but you'll probably have to touch it with bare fingers to get
the seal in so don't go heat it beyond what you can touch.
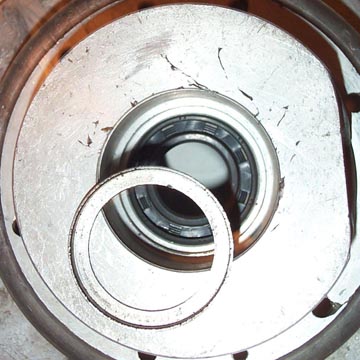
It is important that the seal
seats nice and flat against the lip in the mag flange. Above is a shot
from the flywheel side of the mag flange showing the seal correctly
orientated and seated.
The mag side parts include a
spacer washer that keeps the oil seal in place as there is a gap
between the seal and the bearing (which will be installed next). This
should go with the flat side towards the seal and the lip towards the
bearing.
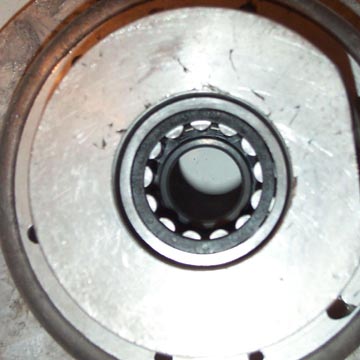
The outer race with the roller
bearings needs to be installed in the mag housing. At this point you'll
need to heat the mag flange with a blow torch to ease the bearing
installation. Be sure to keep the flame away from the recently fitted
oil seal and make sure not to heat the casing beyond about 200 degrees
F or damage can happen to the seal. To make installation even easier
freeze the bearing before installation. Use a drift or large socket to
bang the bearing in to the mag flange, but if you do make sure the
socket edge only makes contact with the outer rim of the bearing.
You'll notice a difference in the sound once it is fully home.
LI/SX/TV Only: Since the LI/SX/TV range has a thinner
flywheel side bearing but uses the same mag side flange, a little space
is necessary between the bearing and the oil seal. As far as I can
tell, this can go in either way up as shown above.
The inboard oil seal is fitted
next, again with the spring and lip towards the crank. This seal is a
bastard to fit but be patient and slowly force it in by hand. If
required you can use a flat piece of wood to carefully bang it in place.
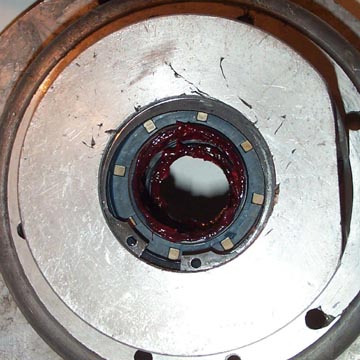
The last two steps are to fit the circlip retaining ring and grease the bearing. Make sure the clip doesn't get caught up on the oil seal. Smear high melting point grease all around the bearing. This bearing is not lubricated by the gasoline/oil mix so the grease is its only lubrication. That's it. Let's move on to the crank installation page. Next Section --> |
|||||||||||||||||