|
 |
 |
 |
 |
 |
 |
||||||||||||
Vespa Pre 1979 Large Frame Engine Work |
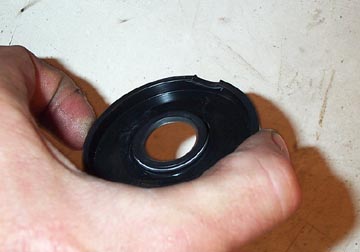
Oil Seals: Clutch SideThere are three main oil seals in a Vespa engine:
There are also some more minor seals around the kickstart quadrant, the clutch cover, and the rear wheel back plate. The main seals should be replaced every time the engine is taken apart as they are cheap to buy but they are buried pretty deep in the engine. If you have the engine apart you might as well drop them in. Clutch side seal: The clutch side seal on an older model large frame bike is different to the
P series equivalent. Older large frames have both bearings lubricated
by the gasoline/oil mixture. On P series bikes the clutch side main
bearing is actually lubricated by the transmission oil because the oil
seal is located between the crank and the bearing...Anway... The following images assume you have already dropped the engine, split the cases, and removed the clutch & crank.
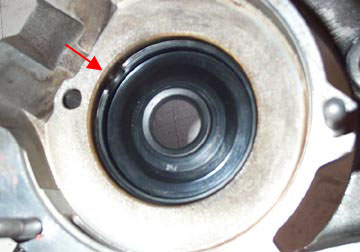
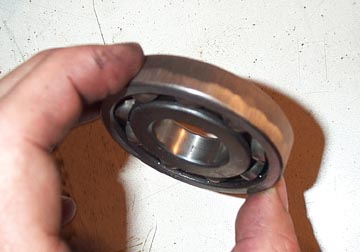
There are two ways to remove the clutch side oil seal. One is banging it out towards the flywheel along with the main bearing. The other is prying it out towards the clutch leaving the main bearing in place. Above is a shot looking through the clutch cover opening at the rear side of the clutch side seal. Whatever method of seal removal you choose, if your bike has an automatic oil mixing system gear (autolube) it is a good idea to remove it as it is very fragile. Use circlip pliers to remove the retaining clip, and be sure to keep all the small washers in order If you plan to leave the main bearing in
place you will need to remove the two bolts and washers that retain it
from the clutch side and pry it out that way, or the other method (as I
did) just use a large socket and bang both the bearing and clutch side
seal through the casing in the direction of the flywheel. This method
should be used if you plan to replace the bearing and the seal. |
|||||||||||||||||