Lambretta Fork Bearings
The main clue to whether you
may need to replace your fork bearings is a shudder while braking from
higher speeds. This may also be caused by the front brake shoes or an
ovaled hub, but a distinct shudder is usually due to the fork bearings
failing, or at least the securing nuts may be loose. Either way here's
how to remove and replace the fork bearings.
The following instructions are
for a Series III bike, but Series I and II are pretty much the same.
You'll need:
- An Allen head socket set or
other driver
- A small flat head
screwdriver
- A large flat head
screwdriver
- A headset retaining ring
removal tool (or a flat head screwdriver & mallet) or some
vice-grips.
- Grease.
- A large adjustable wrench
- Something to set under the
bike to get the front wheel about 18" off the ground.
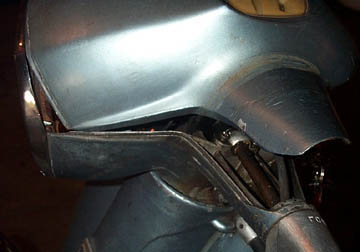
The first step is to remove
the headset top and headlight to get to the fork tube pinch bolt.
Unlike Vespa, Lambrettas have the pinch bolt inside the headset with no
access from the outside. Unscrew the four small screws that hold the
chrome hexagonal ring to the headset top and bottom. The headlight can
then be removed if you want it totally out of the way, or just remove
the upper two and loosen the lower two which will give the ring enough
play to get the headset top off. The bike shown here is an Li125
Special Series III (similar bodywork to a TV175 and SX150). If you have
an Li you will need to remove the three screws around the headlight
chrome ring instead.
 � �
The next step is to remove the
headset top and disconnect the speedo. Remove the two screws (one on
each side) from the underside of the headset to allow the top to be
removed. The speedo cable will hold the headset top down - don't try
and pry it up! Locate the point where the speedo cable is connected to
the front wheel, and feed it upwards as much as possible. This should
allow the clearance needed to lift the headset top, reach in, and
unscrew the speedometer cable from the speedo unit as well as pull out
the single speedo bulb. The headset top should now lift off.
You can either move all the
wiring to one side, or disconnect it all from the headlight block. Make
sure you keep a good record of where it all plugs in for the rebuild.
Once everything is out of the way, you'll see the single Allen head
pinch bolt which keeps the headset connected to the fork tube. Loosen
and fully remove the Allen head bolt and shake proof washer.
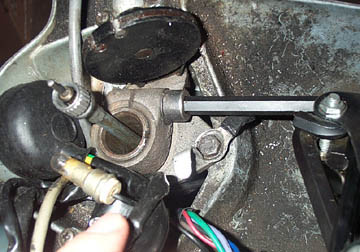
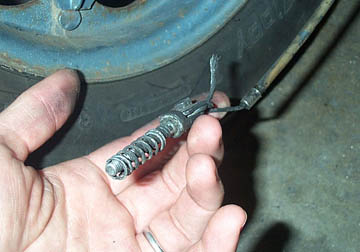
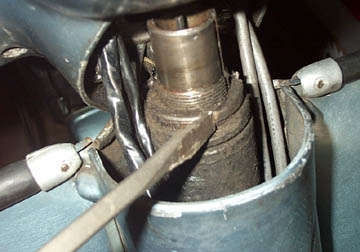
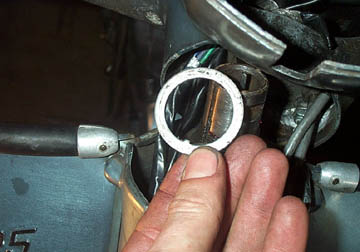
Since the brake cable on a
Lambretta does not run through the forks you can simply unscrew the
large circular adjuster (arrowed).
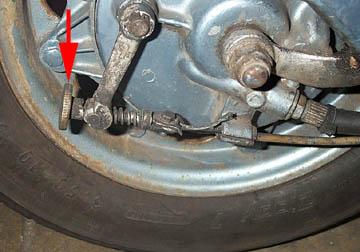
Once the adjuster is removed,
push the threaded part back through the arm, and disconnect the brake
cable from the casting in the brake hub.
Grab the levers of the
handlebars and twist from side to side while holding the front wheel in
between your feet. As you do this, lift up and the headset should start
to rise up and off the fork tube. Most bike will have enough length in
the electrical and control cables to allow you to get the headset off
the tube and fold it back without disconnecting anything.
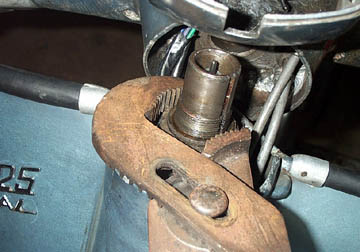
If you have the correct tool
for this job it is by far the best way to loosen the retainer. I don't
have one so I use a flat head screwdriver and hammer to loosen the top
retainer. It unscrews just like a normal nut.
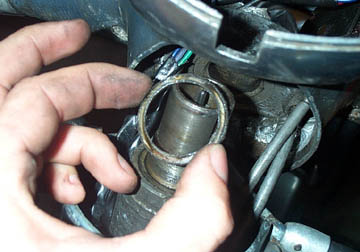
After the first retainer,
there is a single washer with a small peg which slots down a groove in
the fork tube. Remove it and check the peg is in good condition. If
not, replace the washer.
The final retainer can be
removed with a large wrench. Make sure the front wheel is supported if
your center stand lifts it off the ground. It is harder to loosen this
nut with gravity pulling the forks down.
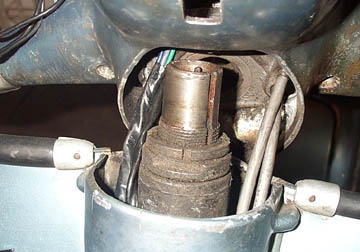
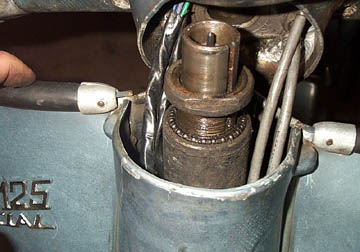
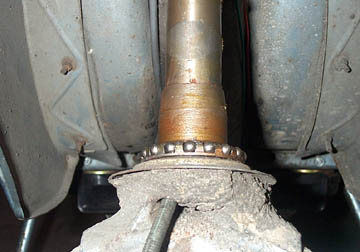
As the last retainer comes
off, the caged bearing is visible in its groove. Once the retainer and
bearing race are out of the way the forks can be dropped out of the
bottom of the bike, along with the speedo cable.
To drop the forks, place
blocks under the center stand to get the front end high off the ground.
You can also remove the rear shock to drop the rear of the bike even
further. As the forks drop out another larger bearing race will be
visible under the front mudguard.
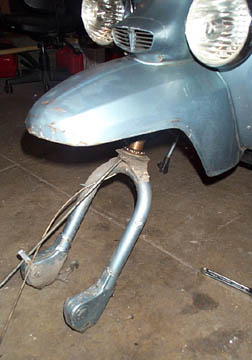
I happened to have my front
wheel off in the shot above, but it is not necessary if you are just
removing the forks. This shot was also before the blocks under the
center stand to get the forks clear of the bike.
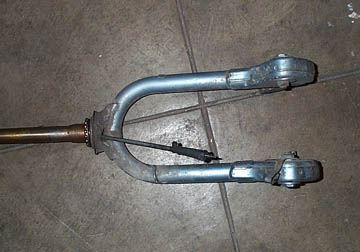
With the forks out of the
bike, you can either rebuild them, repack the old bearings with grease,
or replace the bearings completely. Inspect the surfaces that the
bearings run in and clean them up with a solvent to remove the old
grease, and steel wool to remove any surface rust. If the bearing races
are pitted or badly rusted they should be replaced (you'll have to look
in the service manuals for how to do it as this bike didn't need them
replaced).
When reassembling the forks
into the frame, make sure all the bearings are well greased. Always use
the both retaining nuts with the pegged washer in between. This
effectively makes a locked nut system so that it cannot loosen while
you are riding. When tightening the first retainer with a wrench make
it tight enough so the forks can't rock about, but loose enough so that
when the wheel is off the ground, the forks will fall to the left or
right from center if given a little tap on the front wheel. Make sure
you use a shake proof washer when reinstalling the pinch bolt. Before
the headlight is installed do your best to make the headset point
straight when the front wheel points straight. Tighten the pinch bolt
and quick test drive will let you know if you are aligned before
reinstalling the headlight & headset top. If not you can easily
make small adjustments by loosening, but not removing the pinch bolt.
|