VespaAutomatic ProjectBottom End Rebuild |
Bottom End Rebuild
After disassembling the top and bottom end of the crankcase, I cleaned it, and then bead blasted the parts to get them clean.
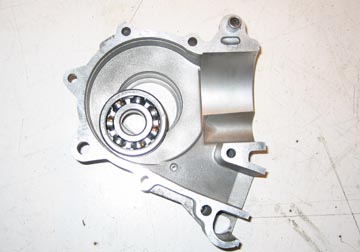
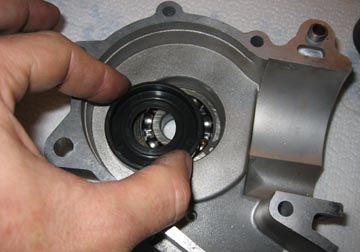
The wheel side of the
crankcase had a very loose bearing in it so I got a new one from my
local scooter shop. It is the same bearing as a small frame drive
bearing so it was easy to come by. To fit the bearing I heated up the
casting with a blow torch to get the metal to expand slightly.
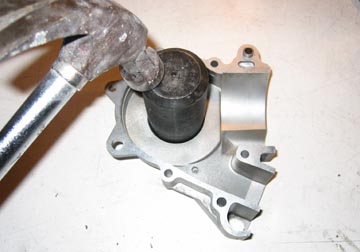
I then used a metal block with
a flat face to bang it in to the casing until it was flush with the
other side. Make sure it is on a solid flat surface so you don't damage
the gasket face on the other side.
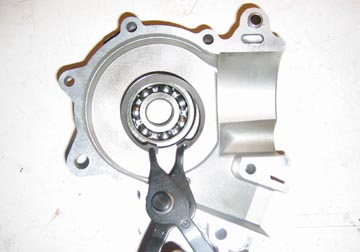
Then the retaining clip I
removed during the strip down is reused to hold the bearing in place.
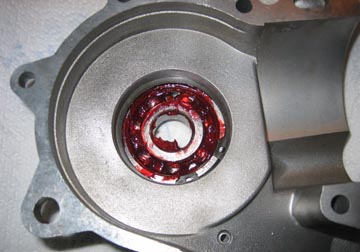
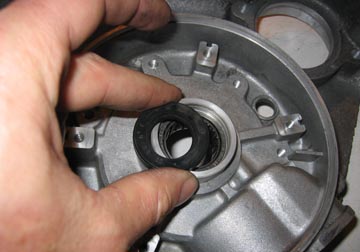
This bearing has no
lubrication from the gasoline/oil mixture in the intake, or by the
transmission oil in the gearbox, so I used a good amount of high
melting point grease for lubrication.
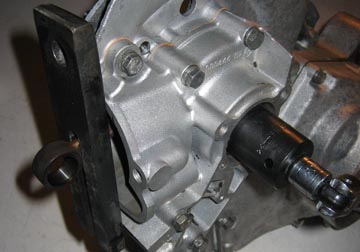
Next the wheel side oil seal
is fitted. I took this picture just before I packed the bearing with
grease so it isn't visible in the shot above. The oil seal goes in with
the little circular spring facing towards the crank as shown. This went
in easily with finger pressure only, but if it is tight you can use a
socket of similar diameter to get the edges into the hole.
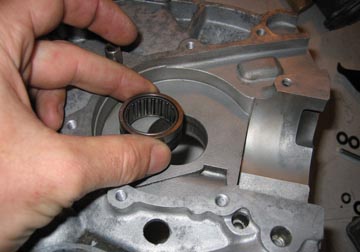
The flywheel side takes a
caged needle roller bearing with a race that fits on the shaft of the
crank. I had my local scooter shop replace the crank race because it is
a very tight fit on a very long shaft and I didn't have the tools to do
it. I heated up the casing with a blow torch before placing the
bearing. The new flywheel bearing is placed into the casing from the
crank side, and then carefully hammered squarely in to place with the
same metal block I used for the wheel side. Once the face of the
bearing is flush with the casing face it is installed correctly. I put
a little two stroke oil on the bearing rollers for lubrication.
The flywheel oil seal is
pressed in from the flywheel side until the face is flush with the
casing.
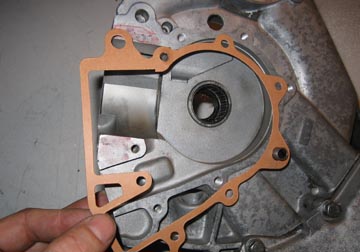
I found a gasket set for the
PK50 Automatica through the 125 Automatica through SIP Scootershop.
Place the gasket on the gasket face and use a small smear of grease to
hold it in place. Also grease the lip of both oil seals.
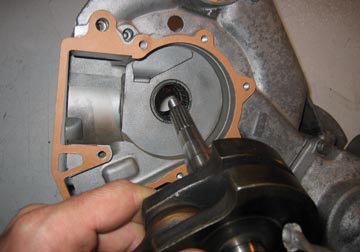
Place the crank through the
flywheel side, but check to make sure it doesn't bind on the oil seal
in any way. Once the crank is in place the con rod gets in the way of
the gasket which sticks beyond the casing opening. I knew I would trim
this later so I simply tore out an area for the con rod to pass through.
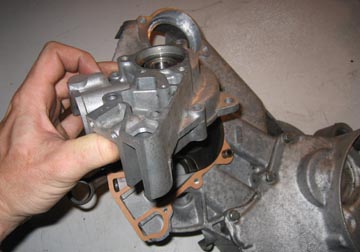
Drop the wheel side of the
casing over the crank end. Make sure the dowels in the casing align
properly with the crankcase half, and also be sure the gasket is placed
correctly and doesn't warp or tear.
Tighten the series of bolts
around the perimeter of the casting. I plan to add an oil mixer device
to this bike and some of the bolts must be longer to do it. For now I
want to be sure the motor can fit in the frame so I have temporarily
fitted all the bolts and tightened them up.
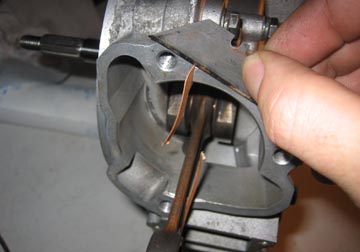
Using a razor blade, I
carefully trimmed the excess gasket from where the barrel and carb
intake will be located.
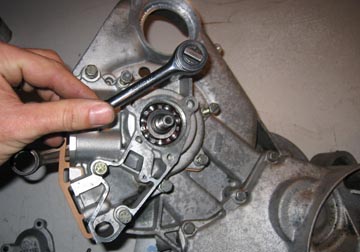
The final step was to add the
crank retaining nut (further discussed in the oil mixer section) and tighten it
up. To make sure I could get it nice and tight, I used a con rod
holding tool while tightening the nut on the crank. Next Section --> |
||||||||||||||||||