Vespa1960 VBA 150Disk Brake |
Disk Brake:I got this idea by looking around the internet at different bikes where I came across a Vespa GL with a disk brake on the East Coast owned by John Irvine. He built his bike with a cable operated master cylinder in the glove box, but recommended a full hydraulic set up if I didn't mind changing the headset. The forks he recommended are from a Vespa PK125 which was never sold in the States so I contacted Beedspeed (a shop in England) and had a set sent over. The disk brake kit is an aftermarket part that can be added to either PX, T5, or PK forks but as far as I know it is only made for the 20mm front axle. Older P series bikes have a 16mm front axle. If you are unsure which axle diameter you have click here for a brief description on how to identify a 16mm axle and a 20mm axle without removing the front hub. The PK125 forks have a 20mm axle and although the VBA mudguard (fender) has to be re-worked (see below) to fit the new forks, the forks themselves drop in to the VBA frame without too much hassle. The steering stops had to be changed but the fork stem length was correct.
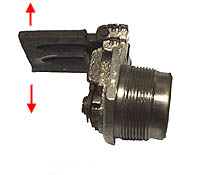
The fork lock system on the PK125 fork stem is very different than the VBA steering column that is mounted in the frame. The PK lock works by extending a pin into a cut out in the fork similar to a P200. The VBA works by moving a spring loaded tab onto the face of the fork stem or away from it to unlock. Below is a shot off a VBA lock showing the tab that hinges on the lock body.
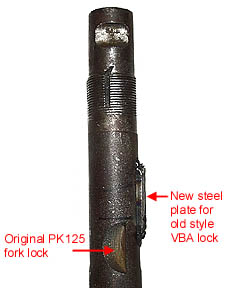
I installed the forks complete with bearings but without the lock installed to mark where I needed to add a metal tab. I pushed a marker through the top and bottom of the hole and turned the forks from left to right. Once removed the fork stem showed a clear point to weld a receiving tab for the steering lock. A small piece of scrap was added to allow the lock tab to stop the steering from turning. The PK hole is now unused (see below).
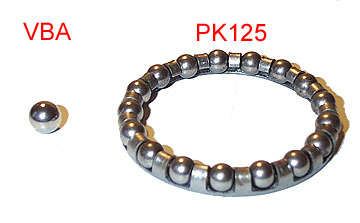
Before fitting the fork it is imperative to use the same bottom fork races as the bike you are putting the forks into. There are 2 parts to the races themselves: a metal receiving section force fitted into the bottom of the frame fork tube, and another one that sits on the forks just above the fender. The PK ones are smaller and take a caged bearing with a smaller bearing diameter than a VBA. The solution is to remove the bottom tube mounted VBA race from the VBA forks and install it on the PK forks. If this is not done the forks will shudder badly under braking (I know because I did it the first time and had to remove the forks to do it correctly). Below is a comparison of the two races from the PK and VBA, and the two bearings.
..and the race that fits onto the fork tube:
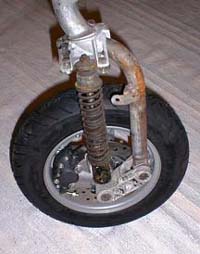
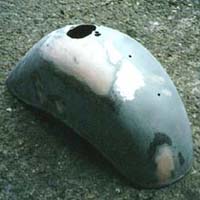
The last step was to modify the fender to accept the new fork. The VBA original fender didn't fit immediately on to the new PK125 forks so some modifications were necessary. The two holes in the side of the VBA fender did not align with the PK fork support hole so they were filled and a new one was drilled. The width of the top mounting bracket was also too wide and pushed the fender off center to the left. I carefully removed as much of the bracket with a grinder to re-center the fender. The final change was to hack saw out the bulge in the VBA fender that typically follows the forks as they come out of the top fender hole. You can see the reworked fender below before painting. The oval holes are to allow for final placement and an over sized washer will cover the hole completely in any position.
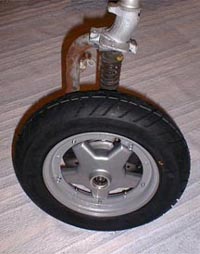
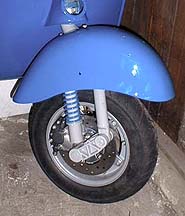
After welding, filling, and painting the modification looks stock - see below.
The routing of the hydraulic line is a little more tricky. If I run it through the forks where the old brake line used to go I'll be stuck if I ever need to remove the forks in the future. I'd like to keep this stock looking but I also need to have it be functional.
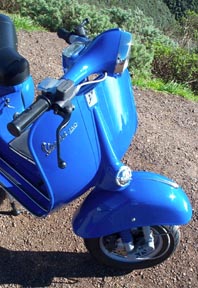
The bike is now finished so I thought I'd update the page with a new picture. I decided to go with the internal running of the brake line. It passes through a small grommet in the headset and then continues down the center of the forks until it comes out the original front brake line hole in the forks. Although it may be a pain if I ever need to remove the forks I am gambling that I won't need to do it for a while and I prefer the look of the internal line. Next Section --> |
||||||||||||||||||