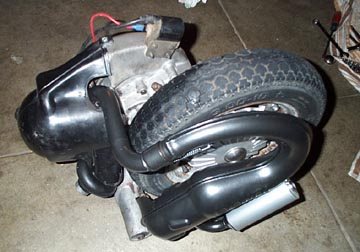
Left Hand Polini Exhaust - Small Frame Vespa
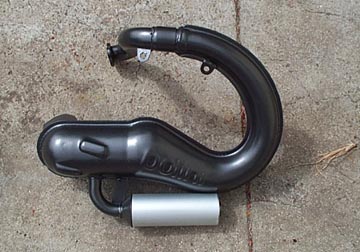
Putting on a Polini exhaust for a small
frame bike is a pretty easy job but there are a few things to know.
Firstly here is what is included with the pipe:
- A two part pipe (the main expansion
chamber and a tube from the exhaust port).
- Two exhaust gaskets (why two? I'm not
sure).
- One spring.
- Polini stickers of all shapes and
sizes.
You'll need:
- A 17mm socket or wrench.
- A 10mm socket or wrench.
- Possible a flathead screwdriver if
you need to remove the cylinder cowl..
The first step is to remove your old box
style exhaust which is held in place by a single 17mm nut at the swing
arm and another two 10mm nuts which passes through the swing arm. The
swing arm bolt is a little annoying as it will almost come out but then
hits the rear tire. You can either deflate the tire or remove it to get
this free - I removed it for the pictures and then installed it again
right after the exhaust was removed as the Polini doesn't have the same
bolt problem.
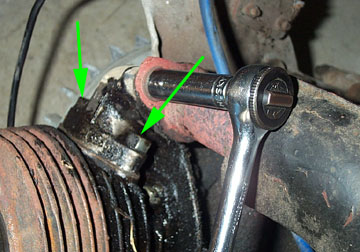
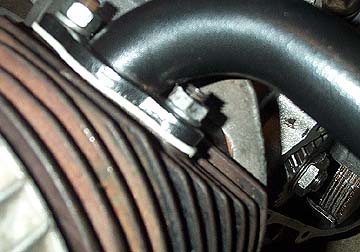
Once the swing arm bolt is removed
you'll need to remove the exhaust stub bolts. Follow the exhaust tube
up until where it hits the cylinder. These are a pain in the ass to
reach when the motor is in the frame, but I had mine out when these
pictures were taken. You may need to remove the cylinder shroud to get
access to the two 10mm (arrowed in green) that connect the exhaust
elbow to the barrel.
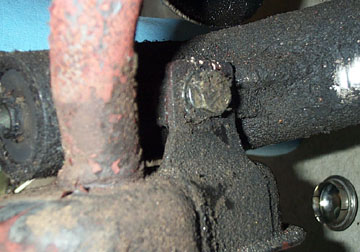
I also replaced the barrel with a Polini
130cc kit on the bike I was working on. The weird thing is that the one
of the Polini bolts on the Polini barrel is too long to fit the Polini
exhaust. I don't think this is the case with the standard barrel studs.
I had to grind the one down on the right as well as the nut to make a
shorter nut and stud. If you need to do any grinding make sure you
stuff a clean rag in the exhaust port to stop any bits flying into the
combustion chamber.
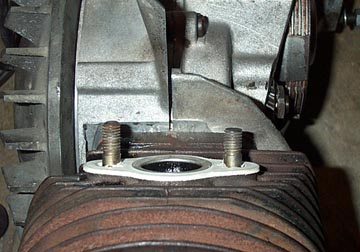
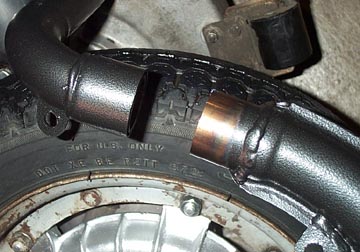
Fit a new exhaust gasket and then bolt
the first exhaust tube in place using two nuts with lock washers to
hold it in place. The shot above shows a slightly out of focus image of
how I needed to grind the nut and bolt down to fit.
Get the expansion chamber part of the
exhaust and carefully slip it into the exhaust tube bolted to the
barrel. This is a nice tight fit so there shouldn't be any reason for
exhaust tape or other sealing compounds.

Then loosely refit the exhaust swing arm
bolt and pivot the expansion chamber slot so that the bolt passes
through it. Once it slides all the way in, tighten the single bolt.
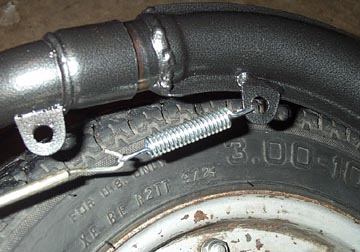
I found that the slip joint at the two
pipes didn't slip in all the way but it did go in enough to make a good
connection. I suppose you could bend the swing arm mounting bracket a
bit if this bothers you. Next, fit the single spring to one side and
stretch it to the other hole. A strong hardened metal hook is a great
tool to help save fingers and knuckles.
Your motor should now be good to go.
Polini doesn't give any insight to whether or not the standard carb jet
should be changed for this pipe. The difference between the standard
and the Polini exhaust is not really apparent except for the different
exhaust pitch, until you open it up. It allows the engine to rev much
more smoothly to what feels like a higher RPM. Overall it seems like a
well priced, well finished pipe that delivers decent performance for
the money.
|