|
 |
 |
 |
 |
 |
|||||||||||
LightsIndicators |
IndicatorsFor some reason the indicators on a battery P-series bikes always seem to be dead whenever I pick one up a second hand bike. They are very easy to fix if you have a decent battery in your bike. To check if they are working, the ignition must be on (in the 2:00 position). Use the handlebar mounted rocker switch on to turn the left, and then the right indicators on. If they are not functioning or they light up but don't flash then we have to go to the source of the problem. You'll need:
The first step is to make sure you have a decent charge in the battey in your bike. Just test this by turning the ignition on and the rear light should come on. There is small chance that all the bulbs may be blown and the battery is still good so you can check it with either a voltage meter or a single bulb you know is good, and a short length of wire Remove the battery side cowling to get access to the battery. The easiest way to test the battery is to hold one end of the wire to the outside metal casing of the bulb with your fingers (with a 12V scooter battery there is no danger of a shock). Hold the other end of the wire to the negative (black) contact of the battery. Then carefully touch only the center point of the bulb base to the positive contact of the battery. There may be a little sparking but if the battery is good then the light will illuminate.
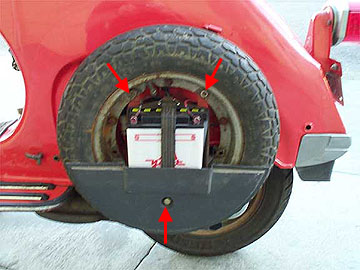
If you find that battery has a charge and the indicators are still not functioning, then you will have to check the flasher unit. To get to it, you must remove the rear wheel and the battery holder. Remove the three 13mm nuts arrowed above and take the spare wheel off the bike frame. Once this is clear you need to remove the battery strap by unhooking it at the bottom. The battery can now be removed, but usually their is enough play in the wires to the terminals that it can be placed on the rear footboards. You will need the battery connected to do the following tests.
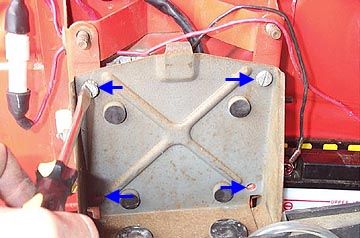
Remove the 4 slotted screws that hold the battery tray onto the frame and lift the battery tray clear.
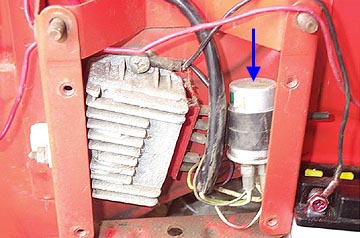
Once the tray is out of the way you'll see the rectifier/regulator, and the indicator flasher (blue arrow). It is held in place by a rubber piece and will simply slip out the bottom. Keep all the connections to the flasher in place and write down which color goes to which contact. There are three connectors to the flasher unit. There are two different set-ups depending on the year of your bike. The one pictured in these shots is a newer bike. Older bikes:
Newer bikes:
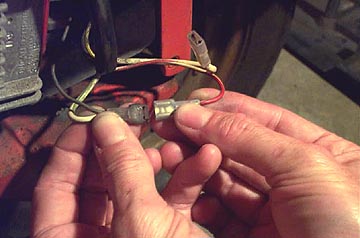
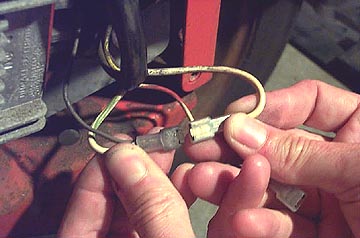
The first test checks if the flasher indicator on the headset is working. Remove all the wires from the flasher and try the following tests. Turn the ignition key to the on position, toggle the indicator switch to the right side, and with the battery still connected touch the red and the green/white connectors together. This should light up the orange indicator bulb on the headset.
The next test checks if the indicators themselves are working. With all the same settings as before, touch the white and the green/white connectors together. This should light both of the right side indicators (but they won't flash). If the battery is charged and either test results in nothing then there is a problem either with the switch, the indicator bulbs, the flasher headset bulb, or the wiring of the bike. If both these tests make the indicators and the indicator headset light work then it is time to replace the flasher as it is broken.
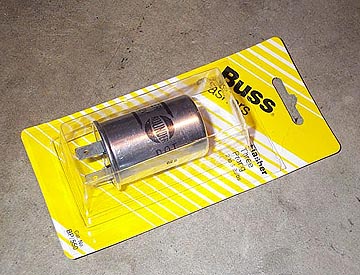
Flasher relays can be bought at any scooter shop for about $5 or less. If you happen to be doing this in a town where there is no scooter shop then you can get the same part from your local auo store. Kragen sell part# BP/550 by Buss for about $2.99 and it is a direct replacement for one you might get at a scooter shop. Plug the new flasher in with the same connections as the one you removed and place it back in the rubber holder. Put the battery tray loosely in place with two screws and set the battery in the tray without the starp. Then refit the battery side cowl, turn the ignition on and check that the left side indicators are also functioning. If everything checks out then refit the battery tray propelry, strap the battery in place, replace the spare wheel, and your indicators are now working again.
|
|||||||||||||||